

简体中文
注意:HBuilderX 3.99及以上版本,个推sdk由aar导入改为仓储方式,所以请注意3.99版本的配置与低版本并不相同。
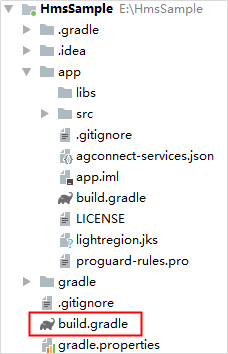
需要引入工程的jar/aar文件
需要将以下jar/aar文件放到工程的libs目录下
| 路径 | 文件 |
|---|---|
| SDK\libs | aps-release.aar, aps-unipush-release.aar, gtc.aar, gtsdk-3.2.11.0.aar, hwp-3.0.1.aar, mzp-3.0.2.aar, oppo-3.0.3.aar, vivo-3.0.3.aar, xmp-3.0.2.aar, oppo-push-3.1.0.aar(HBuilderX 3.3.13及以上), mz-push-internal-4.1.4.aar(HBuilderX 3.3.13及以上) |
HBuilderX 3.99及以上版本所需的libs仅为:
| 路径 | 文件 |
|---|---|
| SDK\libs | aps-release.aar, aps-unipush-release.aar |
| 平台 | 文件 |
|---|---|
| 华为 | hwp-3.x.x.aar |
| 魅族 | mzp-3.x.x.aar、mz-push-internal-4.x.x.aar |
| 小米 | xmp-3.x.x.aar |
| oppo | oppo-3.x.x.aar、oppo-push-3.x.x.aar |
| vivo | vivo-3.x.x.aar |
注意 x.x表示任意版本号 随着版本升级版本号更新
打开build.gradle,在defaultConfig添加manifestPlaceholders节点,如下图所示,将io.dcloud.HBuilder替换成自己的应用包名,将appid等信息替换成申请之后的appid等。
应用的app id/app key等信息,从开发者后台->unipush->配置管理->应用管理 界面查看 ** 注意:HBuilderX3.1.15之后需要添加GETUI_APPID属性 **
android {
    defaultConfig {
        manifestPlaceholders = [
				"GETUI_APPID": "unipush的appid",
                "plus.unipush.appid" : "unipush的appid",
                "plus.unipush.appkey" : "unipush的key",
                "plus.unipush.appsecret": "unipush的secret",
                "apk.applicationId":"io.dcloud.HBuilder"
        ]
    }
}
HBuilderX 3.99及以上版本的配置如下:
项目根目录下的build.gradle
打开项目根目录下的build.gradle
需要在项目根目录下的build.gradle下添加个推的仓库地址,如下:
allprojects {
	repositories {
		jcenter()
		google()
        // 个推的Maven仓地址。
        maven {
            url 'https://mvn.getui.com/nexus/content/repositories/releases'
        }
	}
}
项目应用下的build.gradle
android {
    defaultConfig {
        manifestPlaceholders = [
                "GETUI_APPID": "unipush的appid",
                "plus.unipush.appid" : "unipush的appid",
                "plus.unipush.appkey" : "unipush的key",
                "plus.unipush.appsecret": "unipush的secret",
                "apk.applicationId":"io.dcloud.HBuilder",
                // 根据所需厂商选择集成
                "XIAOMI_APP_ID": "",
                "XIAOMI_APP_KEY": "",
                "MEIZU_APP_ID": "",
                "MEIZU_APP_KEY": "",
                "HUAWEI_APP_ID": "",
                "OPPO_APP_KEY": "",
                "OPPO_APP_SECRET": "",
                "VIVO_APP_ID": "",
                "VIVO_APP_KEY": "",
                "HONOR_APP_ID": ""
        ]
    }
}

dependencies {
    implementation 'com.getui:gtsdk:3.3.3.0'  //个推SDK
    implementation 'com.getui:gtc:3.2.9.0'  //个推核心组件
    // 根据所需厂商选择集成
    implementation 'com.getui.opt:hwp:3.1.1'   // 华为
    implementation 'com.huawei.hms:push:6.11.0.300' // 华为

    implementation 'com.getui.opt:xmp:3.3.1'   // 小米

    implementation 'com.assist-v3:oppo:3.3.0'  // oppo
    implementation 'com.google.code.gson:gson:2.6.2' // oppo
    implementation 'commons-codec:commons-codec:1.6' // oppo
    implementation 'androidx.annotation:annotation:1.1.0' // oppo

    implementation 'com.assist-v3:vivo:3.1.1'  // vivo

    implementation 'com.getui.opt:mzp:3.2.3'   // 魅族

    implementation 'com.getui.opt:honor:3.6.0' // 荣耀
    implementation 'com.hihonor.mcs:push:7.0.61.303' // 荣耀
}
在io.dcloud.PandoraEntry的Activity标签下追加intent-filter,注意不能和其他的intent-filter内容合并到一起!
<intent-filter>
	<action android:name="android.intent.action.VIEW"/>
	<category android:name="android.intent.category.DEFAULT" />
	<category android:name="android.intent.category.BROWSABLE" />
	<data android:host="io.dcloud.unipush" android:path="/" android:scheme="unipush" />
</intent-filter>
添加下列内容到androidmanifest.xml中(未申请平台无需添加)
		<!--小米厂商配置——开始-->
        <meta-data
            android:name="MIPUSH_APPID"
            android:value="XM_${XIAOMI_APP_ID}" />
        <meta-data
            android:name="MIPUSH_APPKEY"
            android:value="XM_${XIAOMI_APP_KEY}" />
		<!--小米厂商配置——结束-->
		<!--魅族厂商配置——开始-->
        <meta-data
            android:name="MEIZUPUSH_APPID"
            android:value="MZ_${MEIZU_APP_ID}" />
        <meta-data
            android:name="MEIZUPUSH_APPKEY"
            android:value="MZ_${MEIZU_APP_KEY}" />
		<!--魅族厂商配置——结束-->
		<!--华为厂商配置——开始-->
        <meta-data
            android:name="com.huawei.hms.client.appid"
            android:value="${HUAWEI_APP_ID}" />
		<!--华为厂商配置——结束-->
		<!--OPPO厂商配置——开始-->
        <meta-data
            android:name="OPPOPUSH_APPKEY"
            android:value="OP_${OPPO_APP_KEY}" />
        <meta-data
            android:name="OPPOPUSH_APPSECRET"
            android:value="OP_${OPPO_APP_SECRET}" />
		<!--OPPO厂商配置——结束-->
		<!--VIVO厂商配置——开始-->
        <meta-data
            android:name="com.vivo.push.app_id"
            android:value="${VIVO_APP_ID}" />
        <meta-data
            android:name="com.vivo.push.api_key"
            android:value="${VIVO_APP_KEY}" />
		<!--VIVO厂商配置——结束-->
修改build.gradle,添加对应平台申请的appkey或appid(键名必须统一,如XIAOMI_APP_ID必须同时存在于build.gradle文件和Androidmanifest.xml文件中),如下所示:
android {
    defaultConfig {
        manifestPlaceholders = [
				"XIAOMI_APP_ID":"ccccccccc",
				"XIAOMI_APP_KEY":"aaaaaaaaaaaaaa"
        ]
    }
}
HBuilderX 3.99及以上版本不需要上述的meta-data配置
在properties中添加如下配置,features节点与services节点必须同时配置!
<properties>
	<features>
		<feature name="Push" value="io.dcloud.feature.aps.APSFeatureImpl">
			<module name="unipush" value="io.dcloud.feature.unipush.GTPushService"/>
		</feature>
	</features>
	<services>
		<service name="push" value="io.dcloud.feature.aps.APSFeatureImpl"/>
	</services>
</properties>
oppo集成uniPush时需在Androidmanifest.xml的入口activity中添加如下配置:
<activity
            android:name="io.dcloud.PandoraEntry">
            <intent-filter>
                <action android:name="android.intent.action.MAIN" />
                <category android:name="android.intent.category.LAUNCHER" />
            </intent-filter>
			/*oppo配置开始*/
            <intent-filter>
                <action android:name="android.intent.action.oppopush" />
                <category android:name="android.intent.category.DEFAULT" />
            </intent-filter>
			/*oppo配置结束*/
        </activity>
当添加了push-3.0.0.aar库时
在app目录下的build.gradle内添加
dependencies {
	implementation 'com.google.code.gson:gson:2.6.2'
	implementation 'commons-codec:commons-codec:1.6'
	implementation 'androidx.annotation:annotation:1.1.0'
}
HBuilderX 3.99及以上版本,仅需在app目录下的build.gradle内添加
dependencies {
    implementation 'com.assist-v3:oppo:3.3.0'  // oppo
	implementation 'com.google.code.gson:gson:2.6.2'
	implementation 'commons-codec:commons-codec:1.6'
	implementation 'androidx.annotation:annotation:1.1.0'
}
HBuilder X 3.0.7及以上版本uniPush更新了华为推送,新版本需要添加如下配置
项目根目录下的build.gradle
打开项目根目录下的build.gradle
需要在项目根目录下的build.gradle下添加华为推送的仓库地址,如下:
buildscript {
	repositories {
		jcenter()
		google()
		// 配置HMS Core SDK的Maven仓地址。
		maven {url 'https://developer.huawei.com/repo/'}
	}
	dependencies {
		// 增加agcp配置。
		classpath 'com.huawei.agconnect:agcp:1.6.0.300'
	}
}
allprojects {
	repositories {
		jcenter()
		google()
		// 配置HMS Core SDK的Maven仓地址。
		maven {url 'https://developer.huawei.com/repo/'}
	}
}
项目应用下的build.gradle
打开需要集成华为推送的项目的build.gradle
在文件头 apply plugin: 'com.android.application' 下一行添加如下配置。
apply plugin: 'com.android.application'
apply plugin: 'com.huawei.agconnect'
在 dependencies 中添加如下编译依赖
注意:推送库版本号与uniPush对应,不能随便修改。
dependencies {
	implementation 'com.huawei.hms:push:6.5.0.300'
}
HBuilderX 3.99及以上版本,仓储依赖应为:
dependencies {
    implementation 'com.getui.opt:hwp:3.1.1'   // 华为
    implementation 'com.huawei.hms:push:6.11.0.300' // 华为
}
添加添加华为推送的配置文件
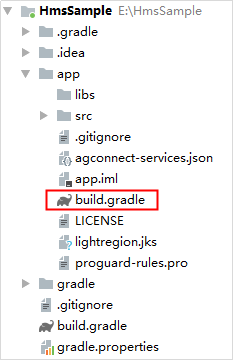
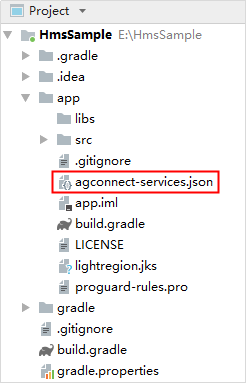
登录华为的AppGallery Connect网站,找到需要集成华为推送的应用,在“项目设置 > 常规”页面的“应用”区域,点击“agconnect-services.json”下载配置文件。
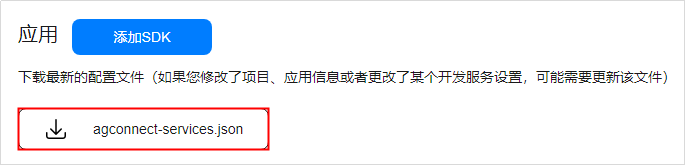
将“agconnect-services.json”文件拷贝到应用级根目录下。
项目根目录下的build.gradle
打开项目根目录下的build.gradle
需要在项目根目录下的build.gradle下添加荣耀推送的仓库地址,如下:
buildscript {
	repositories {
		jcenter()
		google()
		// 配置荣耀的Maven仓地址。
        maven {
            url 'https://developer.hihonor.com/repo/'
        }
	}
}
allprojects {
	repositories {
		jcenter()
		google()
        // 配置荣耀的Maven仓地址。
        maven {
            url 'https://developer.hihonor.com/repo/'
        }
	}
}
项目应用下的build.gradle
dependencies {
    implementation 'com.getui.opt:honor:3.6.0' // 荣耀
    implementation 'com.hihonor.mcs:push:7.0.61.303' // 荣耀
}
需要引入工程的jar/aar文件
需要将以下jar/aar文件放到工程的libs目录下
| 路径 | 文件 |
|---|---|
| SDK\libs | aps-release.aar, aps-unipush-gp-release.aar, sdk-for-gj-4.4.3.1.aar, aps-igexin-fcm-release.aar ,fcm-3.1.1.aar |
注意:要想使用谷歌推送必须使用aps-unipush-gp-release.aar
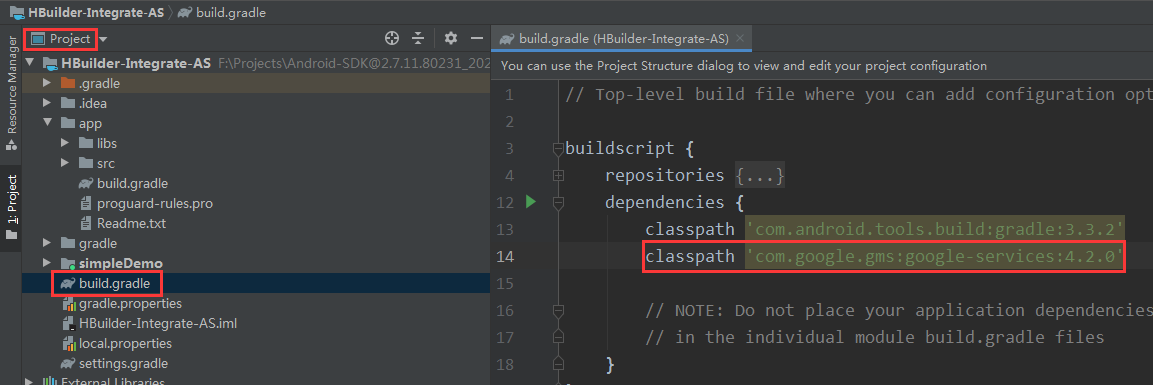
在project级的build.gradle的buildscript->dependencies添加下面内容
buildscript {
	dependencies {
		classpath 'com.google.gms:google-services:4.3.10'
	}
}
如下图:
apply plugin: 'com.google.gms.google-services'
android {
    defaultConfig {
        manifestPlaceholders = [
                "GETUI_APPID": "unipush的appid",
                "plus.unipush.appid" : "unipush的appid",
                "plus.unipush.appkey" : "unipush的key",
                "plus.unipush.appsecret": "unipush的secret",
        ]
    }
}
implementation 'com.google.firebase:firebase-messaging:23.2.1'
在创建好Firebase应用时,会有自动弹框指引下载googie-services.json,请根据指引下载google-services.json文件,并根据官网指引将google-services.json文件放在对应的文件夹下, 然后点击continue.
注意:FCM与上文的谷歌推送的区别为:这个库是单独集成FCM的库,而上文的谷歌推送是基于个推实现的,所以不要同时集成。
需要在project级的build.gradle设置
buildscript {

  repositories {

    google()  // Google's Maven repository
  }

  dependencies {
    // ...
    classpath 'com.google.gms:google-services:4.3.10'  // Google Services plugin
  }
}

allprojects {
  // ...

  repositories {
    google()  // Google's Maven repository
    // ...
  }
}
app级的build.gradle设置
apply plugin: 'com.google.gms.google-services' // Google Services plugin
dependencies {
    implementation 'com.google.firebase:firebase-messaging:23.2.1'
}
application节点内配置如下代码
<application>
		//...
        <service
            android:name="io.dcloud.feature.fcm.FCMVendorService"
            android:exported="false">
            <intent-filter>
                <action android:name="com.google.firebase.MESSAGING_EVENT" />
            </intent-filter>
        </service>

        <meta-data
            android:name="com.google.firebase.messaging.default_notification_channel_id"
            android:value="%YOUR-CHANNEL-ID%" />

		<meta-data
            android:name="com.google.firebase.messaging.default_notification_icon"
            android:resource="%NOTIFICATION_ICON%" />
		//...
    </application>
YOUR-CHANNEL-ID设置为您自定义的通知的channelId ,NOTIFICATION_ICON设置为推送消息的图片添加google-services.json
在创建好Firebase应用时,会有自动弹框指引下载googie-services.json,请根据指引下载google-services.json文件,并根据官网指引将google-services.json文件放在对应的文件夹下, 然后点击continue.
需要引入工程的aar文件
需要将以下aar文件放到工程的libs目录下
| 路径 | 文件 |
|---|---|
| SDK\libs | aps-release.aar,aps-fcm-release.aar |
dcloud_properties.xml需要添加如下代码
dcloud_properties.xml文件在assets/data目录下
<feature name="Push" value="io.dcloud.feature.aps.APSFeatureImpl">
	<module name="fcm" value="io.dcloud.feature.fcm.FCMPushService" />
</feature>
